Gloomy's Blog

Gloomy's Blog Website

0%

RGB的一些基础知识

<Excerpt in index | 首页摘要>

RGB的一些基础知识

<The rest of contents | 余下全文>

前提

最近在看FFMPEG的东西,发现很多内容由于没有相关基础知识支撑 导致看得人云里雾里的。

所以决定先好好学习学习基础理论知识。

昨天学习YUV博文地址

今天学习RGB

什么是RGB

RGB描述一个像素点的颜色值是利用Red、Green、Blue值来描述(3原色)

1
2
3
4
5
6
7
8
9
10
计算机彩色显示器显示色彩的原理与彩色电视机一样,

都是采用R(Red)、G(Green)、B(Blue)相加混色的原理:

通过发射出三种不同强度的电子束,使屏幕内侧覆盖的红、绿、蓝磷光材料发光而产生色彩。

这种色彩的表示方法称为RGB色彩空间表示(它也是多媒体计算机技术中用得最多的一种色彩空间表示方法)。


根据三基色原理,任意一种色光F都可以用不同分量的R、G、B三色相加混合而成

RGB的处理

让我们直接上代码看看吧

本文中RGB一律采用的24位的不带A通道(Alpha)即1个byte占一位

RGB文件的播放器就是上篇文章的YUV播放器

分离RGB24像素数据中的R、G、B

先看一下代码

1
2
3
4
5
6
7
8
9
10
11
12
13
14
15
16
17
18
19
20
21
22
23
24
25
26
27
28
29
30
31
32
33
34
#include <stdio.h>
#include <stdlib.h>

void rgb24_split(int w, int h, int num){
FILE *fp = fopen("../source/RGB_24bit_500x500.rgb","rb+");
FILE *fp1 = fopen("../source/RGB_24bit_500x500_r.y","wb+");
FILE *fp2 = fopen("../source/RGB_24bit_500x500_g.y","wb+");
FILE *fp3 = fopen("../source/RGB_24bit_500x500_b.y","wb+");

unsigned char *pic=(unsigned char *)malloc(w*h*3);

for(int i = 0; i < num; i ++){
fread(pic, 1, w * h * 3, fp);

for(int j = 0; j < w * h * 3; j+=3){
fwrite(pic + j, 1, 1, fp1);//R
fwrite(pic + j + 1, 1, 1, fp2);//G
fwrite(pic + j + 2, 1, 1, fp3);//B
}
}

free(pic);
fclose(fp3);
fclose(fp2);
fclose(fp1);
fclose(fp);
}

int main(){

rgb24_split(500, 500, 1);

return 0;
}

RGB文件的大小就是宽度x高度x3

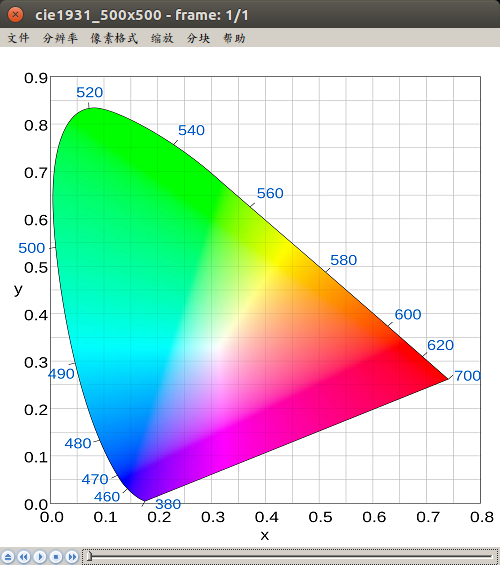
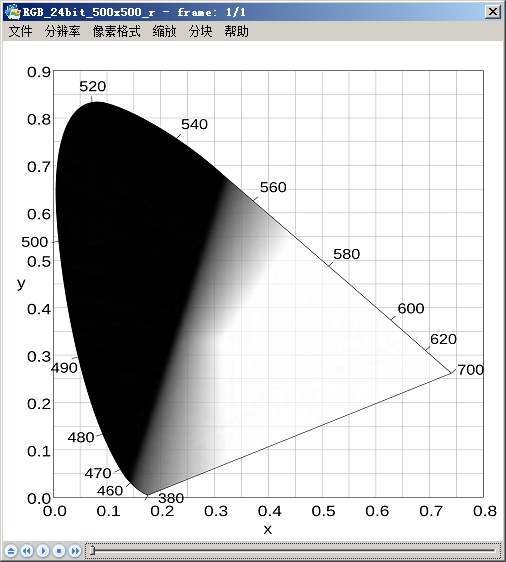
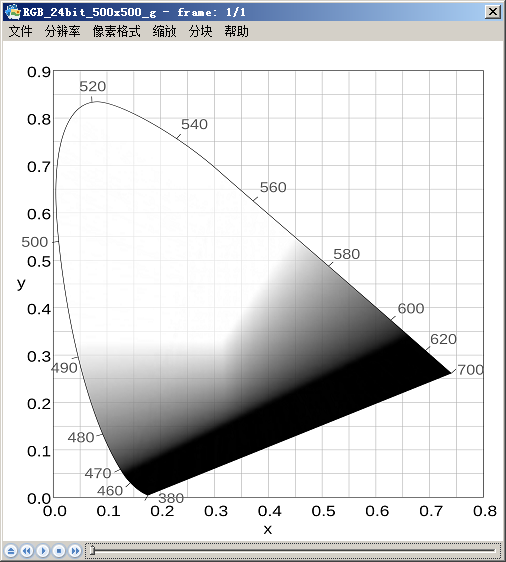
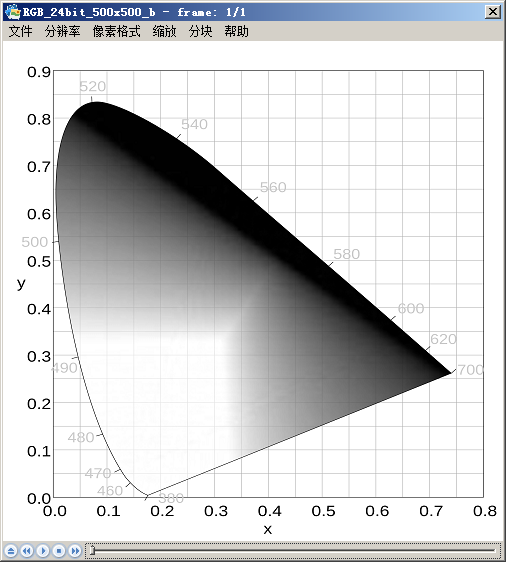
跑起来之后让我们看一下对比图(顺序依次为:原图、R、G、B):

注意播放后三个视频的时候,像素格式选择为RGB24,分辨率大小是500x500

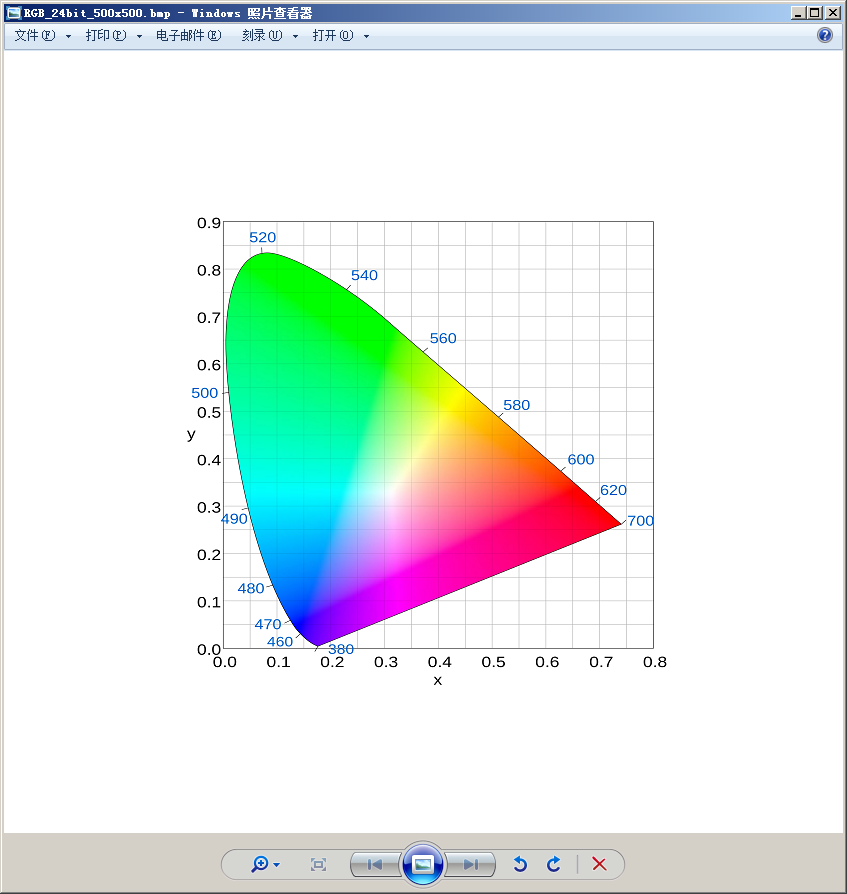
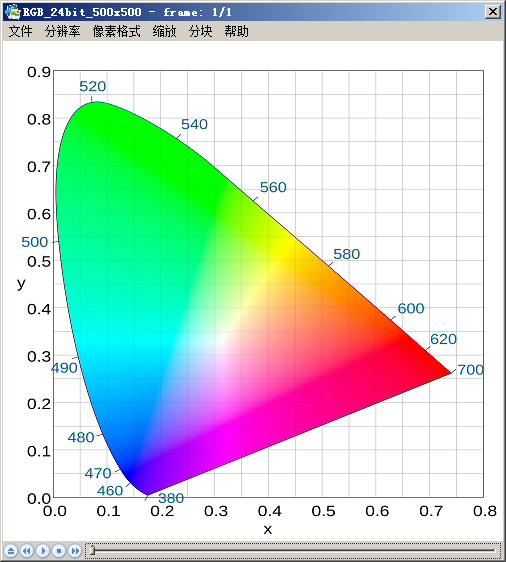
通过RGB文件创建BMP文件

BMP是无损图片的格式,它就是一个在RGB的描述基础之上加了一些头文件。

先看看代码:

1
2
3
4
5
6
7
8
9
10
11
12
13
14
15
16
17
18
19
20
21
22
23
24
25
26
27
28
29
30
31
32
33
34
35
36
37
38
39
40
41
42
43
44
45
46
47
48
49
50
51
52
53
54
55
56
57
58
59
60
61
62
63
64
65
66
67
68
69
70
71
72
73
74
75
76
77
78
79
80
81
82
83
84
85
86
87
#include <stdio.h>
#include <stdlib.h>

typedef struct {
long imageSize;
long blank;
long startPosition;
} BmpHead;

typedef struct {
long Length;
long width;
long height;
unsigned short colorPlane;
unsigned short bitColor;
long zipFormat;
long realSize;
long xPels;
long yPels;
long colorUse;
long colorImportant;
} InfoHead;

void rgb24_2_bmp(int width, int height){
int i=0,j=0;

BmpHead m_BMPHeader={0};
InfoHead m_BMPInfoHeader={0};
char bfType[2]={'B','M'};
int header_size = sizeof(bfType) + sizeof(BmpHead) + sizeof(InfoHead);

unsigned char *rgb24_buffer = NULL;
FILE *fp_rgb24=NULL,*fp_bmp=NULL;

fp_rgb24 = fopen("../source/RGB_24bit_500x500.rgb","rb");
fp_bmp = fopen("../source/RGB_24bit_500x500.bmp","wb");

rgb24_buffer = (unsigned char *)malloc(width * height * 3);

fread(rgb24_buffer, 1, width * height * 3, fp_rgb24);

//拼装头部的信息数据
m_BMPHeader.imageSize=3*width*height+header_size;
m_BMPHeader.startPosition=header_size;

m_BMPInfoHeader.Length=sizeof(InfoHead);
m_BMPInfoHeader.width=width;
//说明图象的高度,以象素为单位。
//注:这个值除了用于描述图像的高度之外,它还有另一个用处,就是指明该图像是倒向的位图,还是正向的位图。
//如果该值是一个正数,说明图像是倒向的,
//即:数据的第一行其实是图像的最后一行,如果该值是一个负数,则说明图像是正向的。
//大多数的BMP文件都是倒向的位图,也就是时,高度值是一个正数。
//我们这里是正图,所以需要要用取反
m_BMPInfoHeader.height=-height;
m_BMPInfoHeader.colorPlane=1;
m_BMPInfoHeader.bitColor=24;
m_BMPInfoHeader.realSize=3*width*height;

//写出保存
fwrite(bfType, 1, sizeof(bfType), fp_bmp);
fwrite(&m_BMPHeader, 1, sizeof(m_BMPHeader), fp_bmp);
fwrite(&m_BMPInfoHeader, 1, sizeof(m_BMPInfoHeader), fp_bmp);


for(j =0;j<height;j++){
for(i=0;i<width;i++){
char temp=rgb24_buffer[(j*width+i)*3+2];
rgb24_buffer[(j*width+i)*3+2]=rgb24_buffer[(j*width+i)*3+0];
rgb24_buffer[(j*width+i)*3+0]=temp;
}
}


//写出保存
fwrite(rgb24_buffer, 3 * width * height, 1,fp_bmp);

free(rgb24_buffer);
fclose(fp_bmp);
fclose(fp_rgb24);
}


int main(){
rgb24_2_bmp(500, 500);
return 0;
}

然后先来看看效果图

说一些BMP对像素点的描述是B、G、R的顺序,所以需要颠倒一下。

BMP的文件编码格式具体的可以去看看这里

BMP编码格式

RGB24->YUV420P

还是先看代码:

1
2
3
4
5
6
7
8
9
10
11
12
13
14
15
16
17
18
19
20
21
22
23
24
25
26
27
28
29
30
31
32
33
34
35
36
37
38
39
40
41
42
43
44
45
46
47
48
49
50
51
52
53
54
55
56
57
58
59
60
61
62
63
64
65
66
67
68
69
70
71
72
73
#include <stdio.h>
#include <stdlib.h>

unsigned char clip_value(unsigned char x,unsigned char min_val,unsigned char max_val){
if(x > max_val){
return max_val;
}else if(x<min_val){
return min_val;
}else{
return x;
}
}

void rgb_2_yuv420(int width, int height, int num){

FILE *fp_rgb = fopen("../source/RGB_24bit_500x500.rgb","rb");
FILE *fp_yuv = fopen("../source/RGB_24bit_500x500.yuv","wb");

unsigned char *pic_rgb24 = (unsigned char *)malloc(width * height * 3);
unsigned char *pic_yuv420 = (unsigned char *)malloc(width * height * 3 / 2);


for(int i=0;i<num;i++){
fread(pic_rgb24, 1, width * height * 3, fp_rgb);

unsigned char*ptrY, *ptrU, *ptrV, *ptrRGB;
for(int j = 0; j < width * height * 3 / 2; j++){
pic_yuv420[j] = 0;
}

ptrY = pic_yuv420;
ptrU = pic_yuv420 + width * height;
ptrV = ptrU + (width * height * 1 / 4);

unsigned char y, u, v, r, g, b;


for (int k = 0; k < height ; k++){
ptrRGB = pic_rgb24 + width * k * 3 ;
for (int l = 0; l < width; l++){
r = *(ptrRGB++);
g = *(ptrRGB++);
b = *(ptrRGB++);
y = (unsigned char)( ( 66 * r + 129 * g + 25 * b + 128) >> 8) + 16 ;
u = (unsigned char)( ( -38 * r - 74 * g + 112 * b + 128) >> 8) + 128 ;
v = (unsigned char)( ( 112 * r - 94 * g - 18 * b + 128) >> 8) + 128 ;
*(ptrY++) = clip_value(y, 0, 255);
if (k % 2 == 0 && l % 2 == 0){
*(ptrU++) = clip_value(u, 0, 255);
}
else{
if (l % 2 == 0){
*(ptrV++) = clip_value(v, 0, 255);
}
}
}
}

fwrite(pic_yuv420, 1, width * height * 3 / 2, fp_yuv);
}

free(pic_rgb24);
free(pic_yuv420);
fclose(fp_yuv);
fclose(fp_rgb);
}


int main(){
rgb_2_yuv420(500, 500, 1);//宽、高、帧数
return 0;
}

预览图:

转换公式是:

1
2
3
4
5
Y= 0.299*R+0.587*G+0.114*B

U=-0.147*R-0.289*G+0.463*B

V= 0.615*R-0.515*G-0.100*B

U,V在水平和垂直方向的取样数是Y的一半

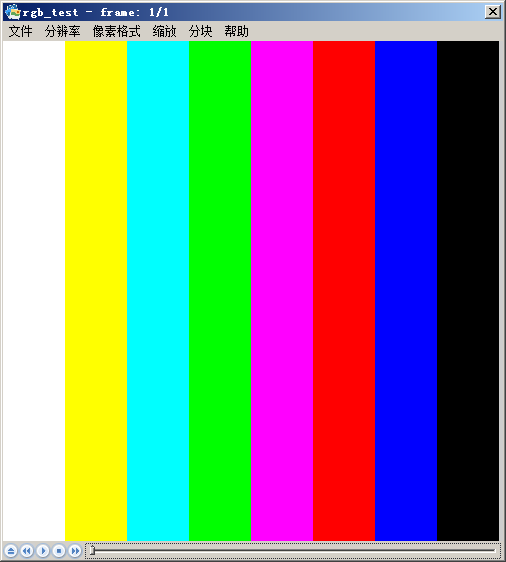
生成RGB24格式的彩条测试图

这个就太简单了看看代码就好了:

1
2
3
4
5
6
7
8
9
10
11
12
13
14
15
16
17
18
19
20
21
22
23
24
25
26
27
28
29
30
31
32
33
34
35
36
37
38
39
40
41
42
43
44
45
46
47
48
49
50
51
52
53
54
55
56
57
58
59
60
61
62
63
64
65
66
67
68
69
70
71
72
73
74
75
76
77
#include <stdio.h>
#include <stdlib.h>

void create_rgb(int width, int height){
unsigned char *data = (unsigned char *)malloc(width*height*3);
int barwidth= width / 8;
FILE *fp = fopen("../source/rgb_test.rgb", "wb");

for(int j=0;j<height;j++){
for(int i=0;i<width;i++){
int barnum=i/barwidth;
switch(barnum){
case 0:{
data[(j*width+i)*3+0]=255;
data[(j*width+i)*3+1]=255;
data[(j*width+i)*3+2]=255;
break;
}
case 1:{
data[(j*width+i)*3+0]=255;
data[(j*width+i)*3+1]=255;
data[(j*width+i)*3+2]=0;
break;
}
case 2:{
data[(j*width+i)*3+0]=0;
data[(j*width+i)*3+1]=255;
data[(j*width+i)*3+2]=255;
break;
}
case 3:{
data[(j*width+i)*3+0]=0;
data[(j*width+i)*3+1]=255;
data[(j*width+i)*3+2]=0;
break;
}
case 4:{
data[(j*width+i)*3+0]=255;
data[(j*width+i)*3+1]=0;
data[(j*width+i)*3+2]=255;
break;
}
case 5:{
data[(j*width+i)*3+0]=255;
data[(j*width+i)*3+1]=0;
data[(j*width+i)*3+2]=0;
break;
}
case 6:{
data[(j*width+i)*3+0]=0;
data[(j*width+i)*3+1]=0;
data[(j*width+i)*3+2]=255;
break;
}
case 7:{
data[(j*width+i)*3+0]=0;
data[(j*width+i)*3+1]=0;
data[(j*width+i)*3+2]=0;
break;
}
}

}
}

fwrite(data,width*height*3,1,fp);

free(data);
fclose(fp);
}


int main(){
create_rgb(500, 500);
return 0;
}

效果图:

源码下载

ok,RGB的学习就到这里为止。

Github下载